Good Earth Global prepared this guide for Engineering for Change’s members and readers. Please see more about their work around the world at www.goodearthglobal.org.
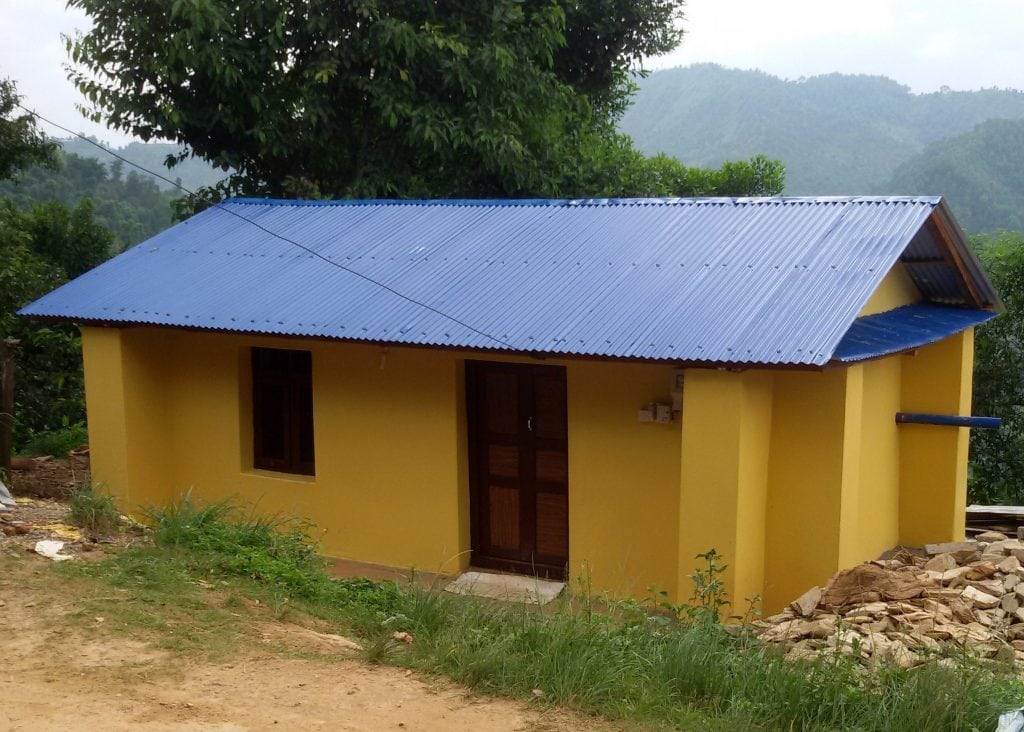
Every one of 55 Earthbag structures built in Nepal survived the 7.8 magnitude earthquake of 2015 with no structural damage. Now village builders and professional engineers alike now embrace the technique. Nepali families live in Earthbag homes, and each morning send their children to safe Earthbag schools. In short, Earthbag building in Nepal is now tried, tested, and proven.
There is, however, a right way and a wrong way to build with Earthbags in Nepal. This building manual is designed to show builders the right way to build with Earthbags, using best practices and time-tested engineering and construction techniques. Critically, all instructions are specially tailored to Nepal’s uniquely challenging building environment.
Following these instruction will allow capable Earthbag builders to erect strong, reliable and cost-effective Earthbag structures, and help the Nepali people rebuild their country safely and sustainably.
Earthbag Technology, an Overview
Earthbag technology is an inexpensive, simple and sustainable method for building structures. Having evolved from military bunker construction and flood control methods, Earthbag buildings are notable for their ability to endure fire, flood, wind, earthquake and vermin, and have been used in disaster-prone zones all over the world. Because Earthbag technology makes minimal use of cement, concrete, steel and timber- and the fuel needed to transport them-Earthbag building is easy on the environment, and doesn’t deplete scarce natural resources. Earthbag technology also requires less expertise than more traditional building methods, and only the simplest of tools.
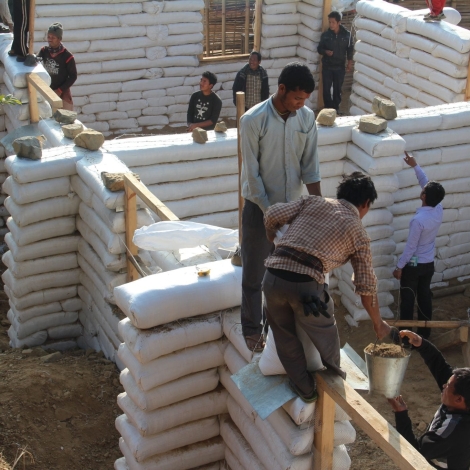
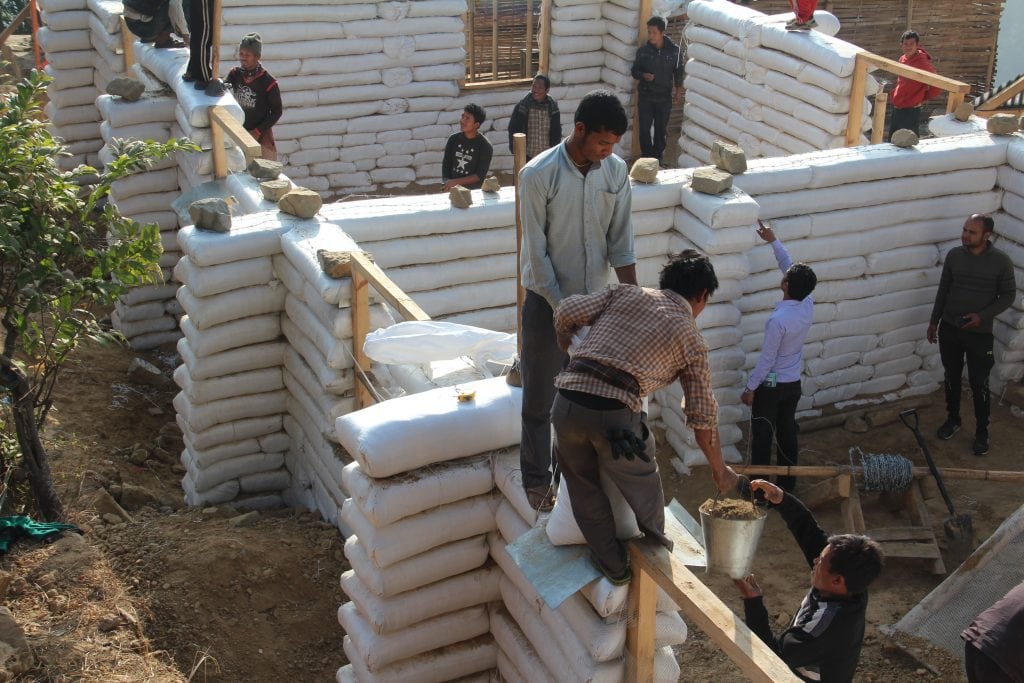
Simply put, Earthbag technology is a wall system, with structures composed primarily of ordinary soil found at the construction site. The soil is stuffed inside polypropylene bags, which are then staggered like masonry and solidly tamped; barbed wire laid between the layers of bags serves as mortar. Earthbag construction in Nepal generally employs a rubble trench foundation and a lightweight roof. Reinforcements such as corner and wall reinforcements, vertical rebar and bond beams are mandatory.
History
Though Earthbag technology is relatively “new”, its true origin dates back thousands of years, to the similar technique of rammed earth construction; some call Earthbag technology “Rammed Earth in a Bag” or “Reinforced Rammed Earth”. Structures utilizing similar tamped, solid earth techniques still stand, from the Alhambra palace in Spain to the Great Wall of China. In recent centuries military and industrial concerns have used Earthbags to build bunkers, roads and dams.
In the 1980s, Iranian-born architect Nader Khalili popularized the notion of building permanent structures using bags filled with earthen materials. At present, there are over 15,000 Earthbag buildings worldwide, with recent Earthbag constructions gaining approval under strict U.S. building codes.
Advantages of Earthbag Building
Earthbag building offers many advantages over existing technologies:
- Safety– Earthbag technology has now been tried and tested in Nepal. More traditional building techniques were also tested, and tragically failed
- Ease of Construction– Earthbag technology is easily learned by rural villagers
- Reduced Use of Materials– Earthbag structures require no bricks or blocks, and a minimal amount of cement, concrete, wood and steel
- Reduced Use of Fuel and Transportation– Use of local soil means fewer materials, less need for transport and lower fuel costs
- Less Pollution– Building with local soil means fewer factories and smoke stacks, fewer trucks and less depletion of Nepal’s forests and natural resources
- Cost-Effective– Building with Earthbags is inexpensive.
Project Preparation and Planning
Budget
Project costs may vary from project to project. Location, climate, terrain and the availability and cost of labor and local materials, community support are all factors to be considered, along with other factors unique to each community.
Design
Simple Earthbag designs are readily available, and adaptable to a wide range of climates and terrains. More sophisticated plans, drafted by Nepal’ growing class of experienced and talented Earthbag architects and engineers, can be custom-tailored to a particular client or site.
Management and Supervision
It is recommended that at least one skilled supervisor is present full time during the entire construction. The supervisor must be trained in Earthbag technology and have also basic knowledge of carpentry and other standard building techniques. A trained engineer should visit a site at various stages of the construction to ensure the builders are following the Earthbag building guidelines.
Labor
The number and type of workers required of course varies from project to project. We recommend to have at least one supervisor per 10 workers. One small to medium size project (300 – 1200 sqft) can be built with only one supervisor, however if the project is bigger we recommend to add more supervisors.
Scheduling
A foundation, walls and a bond beam for a 12X13 ft. (internal area 130 Sq. Ft.) house can be built in 10-14 working days with 7 workers and 1 supervisor. If there are more workers and they are experienced and dedicated, it can take less time (5-8 days).
Build flexibility into a project’s scheduling and above all encourage realistic expectations.
Earthbag projects can start or continue during monsoon season, and several have. Simply hanging a large tarp keeps the structure dry, with no compromise in building quality. Actual work at the site will be slowed down but the bigger problem is logistical, with roads washed out and labor often scarce.
Tools and Supplies
Earthbag structures can be built using only the simplest of tools. The toolshed of a typical Earthbag worksite in Nepal contains the following:
Complete List of Tools
| Digging Picks with Handle | Sewing machine, nylon thread, Oil(optional) |
| Shovels | Water level pipe (hard plastic) |
| Digging Rod | Hammer 1kg |
| Wheel Barrow (optional) | Sledge Hammer 4 Kg |
| Sliders | Wire Cutter Big |
| 10-liter metal buckets | Wire Cutter Small |
| 15-liter plastic buckets | Safety Gloves |
| Water Sprinkler | Hack saw frame |
| Hacksaw blade (good quality) | Tarp (Good Quality) |
| Saw | Plastic Cover |
| Trowel | Rope 2mm |
| Sand paper | Water Pipe |
| Screw driver | Tamper and Side Tamper |
| 2″ round Metal Pipes For poly tube and barbed wire dispenser | Tape Measure (30m) |
| 4′ or 3′ Spirt level | Tape Measure (5m)( good quality) |
| Pliers | Wire Cutting scissor |
Properties of Building Materials
Soil for Bags
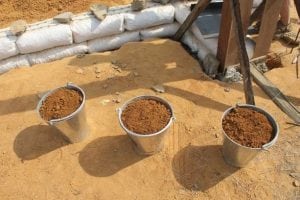
Most soils are adequate to fill the bags and precise ratio is not necessary, but there must be enough clay and moisture to bind the aggregate together. The soil can be easily tested without any equipment, using a drop test or a roll test.
The most common mix is:
25-%-30% Clay
70%-75% Sandy soil
10% Moisture
Bags
Earthbag construction is durable, and if the polypropylene bags are plastered properly the construction can last for hundreds of years. As noted above, a study by the U.S. Federal Highway Administration found that the half-life of polypropylene fabrics in benign environments could be 500 years or more. The bags themselves have a tensile strength even higher than steel, and can resist circumferential forces generated from the weight above.
Recommended quality:
Size: 19″ tube form
Grammage: 4 gm
Barbed Wire
It helps to lock the bags together, and forms a matrix within the wall system. Barbed wire resists outward expansion of the wall caused by weight from above, and its tensile strength resists outplane forces. Barbed wire should be 14 gauge, 4 pointed.
Rebar
Mild steel bars 12mm: Conforming to NS 84-2042 or IS:432-1966 (Part I) with fy = 250 N/mm² (Fe250 Grade)
Recommendation: The rebars should be coated with anticorrosion agent.
Step-by-Step Instructions
1. Survey the site
Consulting an engineer is highly recommended to ensure the site is suitable for Earthbag construction. Since an Earthbag building is a heavy structure, the following factors can affect feasibility:
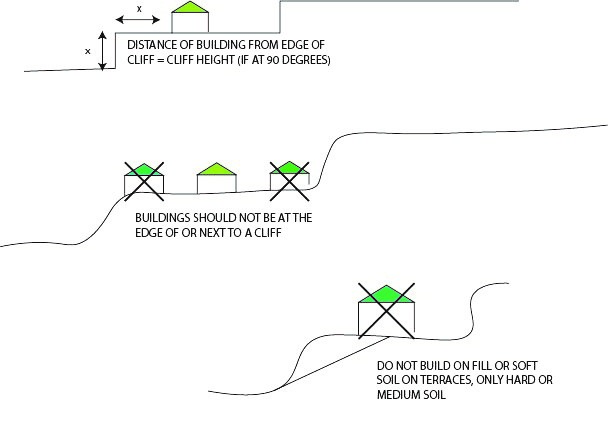
- The topography of the site: If the slope of the site is more than 15%, an Earthbag structure should not be built there.
- Vertical cliff/drop
An Earthbag structure must not be built anywhere near a cliff/drop unless there is a rocky foundation. If an Earthbag structure is built near a cliff/ drop on rocky soil, there must be enough offset, or a retaining wall in front of the building.
- Bearing Capacity
Earthbag buildings should only be built on hard or medium soils as categorized by NBC.
- A house shall not be constructed if the site is:
- Prone to geological fault or near a rupture area
- Susceptible to landslide
- On a steep slope > 15%
- A filled area
- A riverbank or waterlogged area
2. Sample the soil
- Collect the subsoil for testing
It is important to collect subsoil, not topsoil, for testing. Topsoil lies on the surface of the ground, is usually of a darker color, and contains rotting leaves or roots. Don’t use topsoil for Earthbag construction because it can rot and compress.
Subsoil is the layer of soil under the topsoil. It is composed of a variable mixture of small particles such as sand, silt and/or clay and lacks the organic matter and humus content of topsoil. Subsoil usually has higher clay content and is lighter in color than
topsoil. In Earthbag construction always use subsoil to fill the bags.
- Identify clay/sandy soil ratio of the collected subsoil
With Earthbags, the exact proportion of clay to sandy soil is not nearly as important as with adobe or rammed earth construction. Anywhere from 15 to 35% clay should work well; ideal would be 30% clay and 70% sandy soil. If the soil contains too much clay it will expand when wet. If the soil contains too much sand the soil will not bind together and the structure will be weakened.
3. Prepare the site for the construction
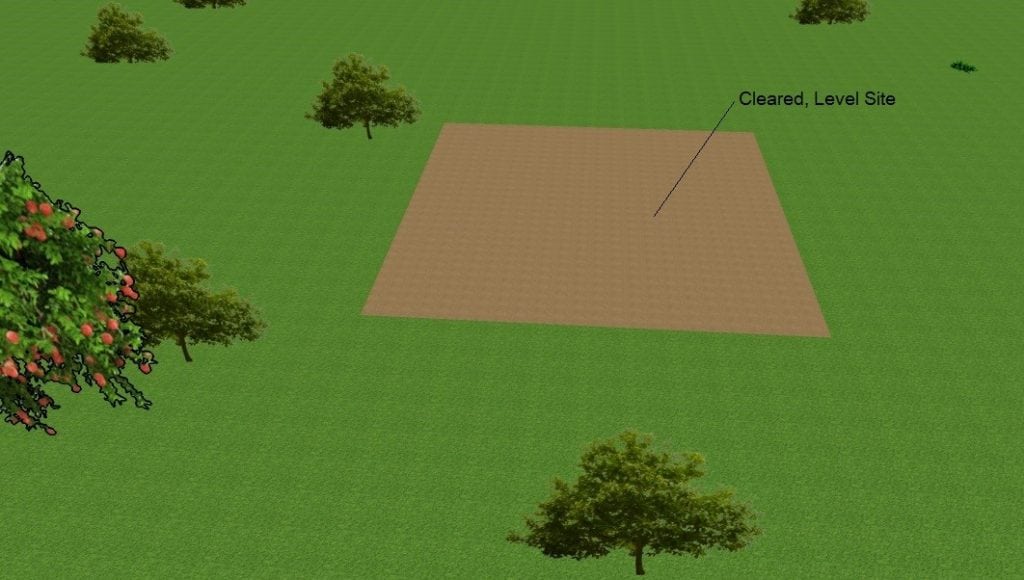
Level the building site and clear it of roots, rocks and other obstacles. Make sure the site has enough space to work on and to pile materials. Remove and store topsoil for future landscaping.
If you plan to build in a hilly area, excavate a flat area so that it will have a level floor inside. You may use the excavated soil to fill some of the bags if the soil is suitable for Earthbag construction.
4. Cover the construction site with a tarp or tent.
Tarps protect walls during construction. This mandatory step will result in stronger walls.
Cover the construction site with a tarp or tent, to protect Earthbags from being exposed to UV radiation or rain. Polypropylene bags or tubes are susceptible to ultraviolet (UV) damage if left exposed to sunlight for more than 1 month, and UV damage cannot be reversed. Prolonged exposure to rain can also weaken the walls.
5. Mark the footprint of the building
Mark the footprint of the building, including necessary corner and wall buttresses.
Corner and wall buttresses: Every 12 feet of the wall should be supported by a buttress. All corners should be supported by corner buttresses. The length of the buttress should be no less than 3 feet. Width of the openings (windows or doors) should not be more than 5 feet. Every opening should be placed at least 3 feet from the inside corner. Locating the opening in the center of the walls is preferable.
Length to width ratio of the building shall not be more than 3. The width of the trench should be the same throughout the trench and the entire bed should be leveled.
6. Build Rubble Trench Foundation and Install Plumbing
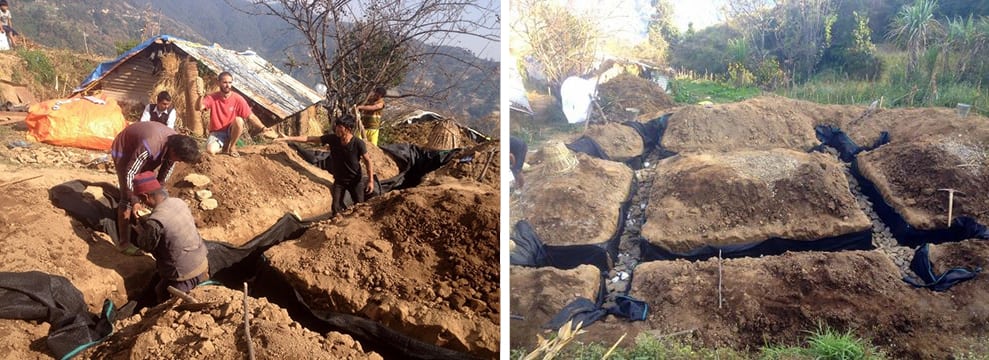
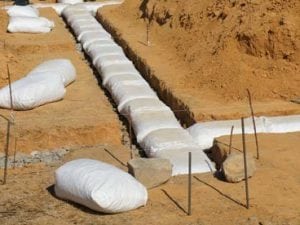
Dig a trench slightly wider than the Earthbag wall (15’’) and about 3 feet deep. Dig trenches for buttresses at the same time. Install plumbing and French drain if necessary. Add rubble until level about 6” below finished grade. Tamp rubble trench until solid and level.
One course of bags filled with gravel should be below grade. This keys the wall into the earth, making it stronger. Have at least one course set below the ground for best stability.
In heavy or damp soil, provide a French drain or pipe to allow the footing to drain after a heavy rain. A footing trench should always reach undisturbed subsoil.
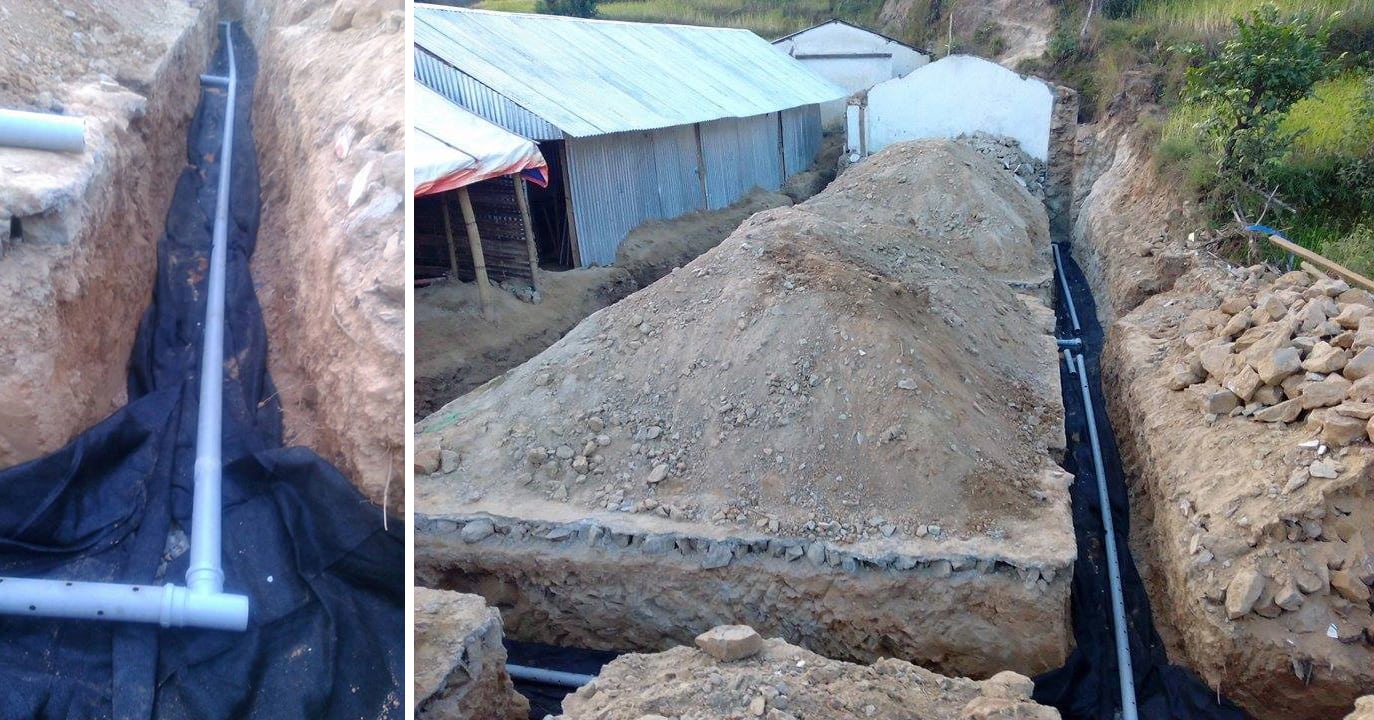
French drain a perforated pipe that redirects surface water and groundwater away from the building site.
French drain a perforated pipe that redirects surface water and groundwater away from the building site.
To install French drain line trench with filter fabrics, lay perforated pipe, fill the trench with rubble, and wrap the rubble with the remaining filter fabric.
7. Fill Gravel Bags
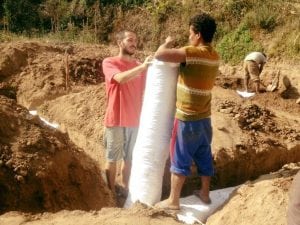 Use doubled solid weave poly bags for gravel. Use custom size bags to ensure the bags overlap at each course. Fill gravel bags in place.
Recommended length of the bag is 3 or 4 feet long.
Fill bags about 90% full, leaving just enough room to close the bags. Close the bags tight before laying it.
8. Place the first course of gravel-filled Bags
Double-bag the gravel for added strength. Place bags on a level gravel bed 6” lower than the finished soil level.
Work from the corners of walls or openings towards the center. Make a custom bag to fill the small spaces.
9. Check Alignment
Align bags to a string-line. For rectangular buildings tie taught strings between corner stakes or batter boards. Look down from directly above the string to see that the bags all line up. Stand several feet away in line with the wall and eye the wall for bulging bag corners or any bags that aren’t lined up properly.
10. Add Barbed Wire
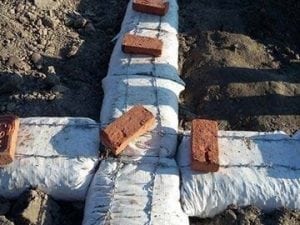
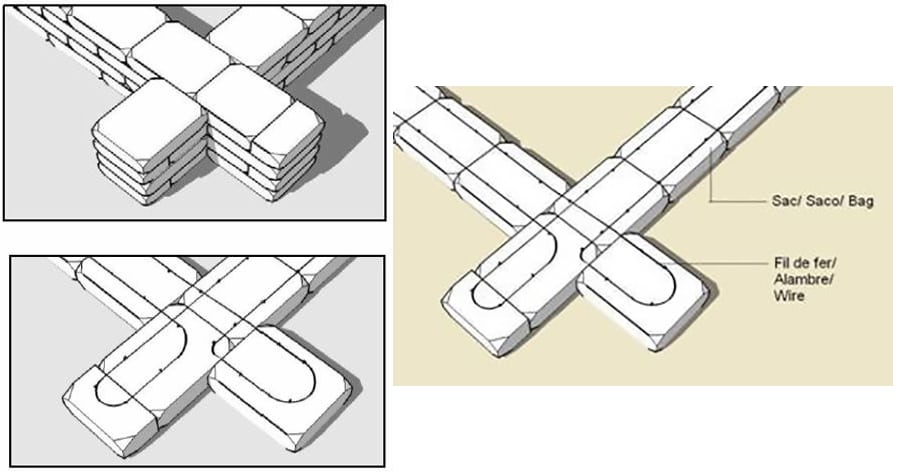
Untwist and straighten barbed wire as you pull it off the reel. Lay two strands of 4-point barbed wire on top of each course of bags. Use bricks or stones to temporarily hold the barbed wire in place. (On higher walls, it may be safer to pin the wire with nails or staples so that nothing can fall off onto workers below.) Run continuous barbed wire around corners for high wall strength.
At least two strands of 4-point barbed wire should be used in-between each course of bags. The thickness of barbed wire should be 16 gauge. The two strands should be not close to each other and not too close to the edge of the wall.
11. Use the Slider Under Bags
Place bag on the slider so the joint will be offset from the course below
Close top tightly. Tilt bag down against previous bag. Starting on the second course, the slider will keep bags from getting hooked on the barbed wire. Place the bag where the bottom will be near the end of the slider so pulling it out is easier. Lift the end of the bag a little and give the slider a little jerk. Adjust bags so that after tamping them the edges will be directly above the course below. This will keep walls vertical.
12. Always overlap bags
Maintain a running bond as is done with masonry. The joints between bags should never line up between courses. Strength is added to walls when upper bags hold lower bags in place well. In a rectangular building, the location that starts the bond pattern is the corner where every other course has a bag end.
Longer bags or tubes are recommended. In seismic areas where extra strength and overlap is required, long bags are important.
13. Lay second or third gravel bag layer above floor level
Use gravel-filled bags until 6” above the risk of moisture damage.
In rainy climates, especially those with strong freeze/thaw cycles, extra height is needed to protect earth walls. Water-resistant bag courses should extend higher than the deepest snow.
If your building has plumbing, it is wise to lay water-resistant bags to 6” above floor level in case of accidental leaks.
14. Make Door Thresholds
After finishing all the courses of gravel bags, install door thresholds.
Pour concrete sills 2-3” (5-7 cm) thick on top of the Earthbags at doors. Finish the concrete surface neatly. Allow enough drying time (4 -7 days) before building the door buck. In order to save time you can pre-cast the threshold.
15. Install doors frames
After the threshold is done and fully cured you can install the door frames in place where doors will go. Set them plumb and level and brace in position. Pin sides of the frames with rebar pins into the bags.
16. Repeat Step 10 after every course
Lay barbed wire after each course of gravel bag or Earthbag as described in Step 10.
17. Prepare the soil for Earthbags
Use sieve to separate big rocks and lumps from the soil. Add water if needed to achieve 10% moisture.
Mix water and soil well to achieve even consistency.
18. Fill Earthbags with Soil
Earthbags take a little more care than gravel bags. After each added bucket of soil, use a small tamper inside or outside the bag or press the bag with your knee. These fat bags will be filled to capacity, saving bags, barbed wire and labor.
Some builders tuck the corners in (diddle them) or pin them to make them neat so walls are flat and smooth.
19. Place First Course of Earthbags
Work from wall corners and openings to the center. Place bags so joints from course below are offset in a running bond. Tilt each new bag down against a previous one.
Because gravel prevents moisture from wicking up into upper courses, no other moisture barrier is needed.
20. Tamp the Course
 Check walls for level every course or two. Tamp the high points first.
Evenly tamp the entire wall several times as you continually move the tamper.
Tamp Earthbags solid and level after each course is complete. Check the wall for level every few courses. On long walls, a hand held level will not work. Raise strings with line levels or use a water level to mark the level on corner guides.
Heavy clay soils compress more when tamped than other soils. Moderate tamping may be fine, but well-tamped walls have extra strength.
21. Using Tubes instead of bags
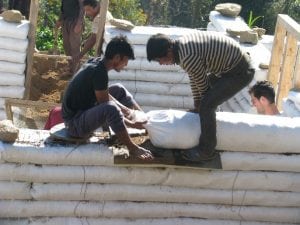 It is possible to use tubes instead of bags. Tubes provide bigger overlap and thus make the structure stronger. Vertical walls can also benefit from tubes to speed work and reduce plastering needed to fill nooks between courses and bag ends.
Tamp the walls and the sides as needed to reduce need for plastering.
22. Install Window Frames
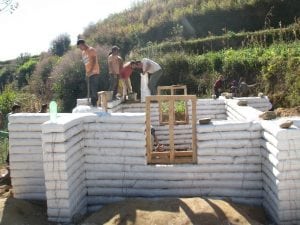 The recommended height of the window sill is 3 feet. Place the window frame so the lintel level coincide with the bondbeam level. Avoid putting earthbag on top of the openings.
Set the buck in the correct location and check for plumb, level and square. The preferred window size is 3 feet wide and 4 feet high.
Brace in position as needed. Use anchor plate to attach the window frame.
Window bucks are similar to door bucks. After placing the buck, continue stacking and tamping bags.
To prevent the window bucks from moving when adjacent bags are tamped, some builders slide pole braces up as the work rises. When the work is done the sideboards can be removed
23. Flatten Walls
Tamp the sides of the bags to flatten walls.
The neater your wall is, the easier the plastering will be. If you will use an earthen or lime plaster inside and a more expensive cement stucco outside, keep the outer wall smoother than the inner wall. Earthen or lime plaster can have a less expensive earthen base coat to level a bumpy wall.
24. Vertical Rebar Reinforcement
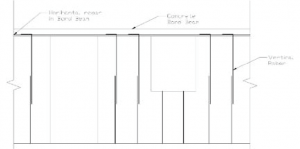 First rebars must be inserted at the sill level. The length of the first rebars should be such that it goes all the way to the first gravel bag.
Hammer rebar in near corners and openings. The distance between rebars should be maximum 3 feet. It can be even less to add strength.
Rebar 12” from ends of walls and openings (30 cm) adds strength. Hammer first rebar at seal level and second rebar at lentil level. Make sure the rebars are long enough to have at least 1 foot overlap within the wall.
25. Install Electrical Boxes
 Electrical boxes can be installed in the following two ways:
- With nail:
Boxes can be directly nailed to the wall using 6” long 6mm diameter rebar. At least two nails should be used for each box and nails should be tilted so that they will provide better resistance against the pull.
- Using wooden anchor:
A small piece of wood can be inserted in between the walls, and the box can be screwed to this piece of wood.
26. Install the Bond Beam
- Concrete
The bond beam must be at least 6” thick and 1’ wide, and should run along the entire wall, including buttresses.
After the wall is done, another piece of rebar is inserted. This should be inclined, not vertical, and should extend 6 inches outside the wall which will anchor into the bond beam. After that beam reinforcement is placed over the wall. Then formwork for the beam is placed on the wall. Concrete should not be leaner than 1:2:4 for casting the bond beam. The beam should be cured at least a week before starting the roof work.
Before placing the concrete an extra piece of rebar is placed on the wall which will anchor the truss with the beam.
- Wooden
Two pieces of 5”X5” wood braced together every foot can be used as bond beam where concrete is not feasible. As wood is lighter than concrete it needs to firmly attached using an extra piece of rebar.
27. Roofs
Install lightweight roof as per government guidelines found in NBC.
28. Plaster
Cement Plaster
Cement plaster makes earthbag wall even more stronger. Plastering on earthbag walls is generally done in three layers. First layer will fill the recesses in between the bag layers. After the first layer dry out the mesh should be tied properly with the wall ties. Then second layer of plaster is applied. Finally, third layer of plaster is applied to get the smooth finish.
Mud Plaster
Mud plaster is applied in a similar way but it requires regular maintenance. So for public buildings mud plaster is not recommended.
Mud plaster takes long time to prepare so it’s better to start preparing it before the construction starts. Lime can be added to increase the strength of the mud plaster.
It can be mud plaster or cement plaster but plaster is mandatory for the earthbag walls as soon as wall is done.
29. Finishing Details
At this point you can install doors, wood trim, shelving and cabinets, and then stain and varnish any woodwork. Follow general carpentry practices. Connect electric outlets and plumbing fixtures.
Usually the next step is painting your home, but plastered Earthbag walls don’t need painting or trim. Many builders choose an attractive plaster color and extend it right up to windows, doors and floors. The last task is the finish flooring, to prevent damaging your new floor.
30. Make the floor
The floor level must be below the gravel bag. You could build any type of floor you want in an Earthbag home. Building a floor on-grade (on the ground) is the simplest and least expensive. Options include concrete slab, stone, recycled brick and earthen floors. Building this way can save you thousands of dollars on floor joists, plywood, fasteners and other materials. Tamped earth floors dry more quickly and can be finished permanently with an attractive oil sealer.
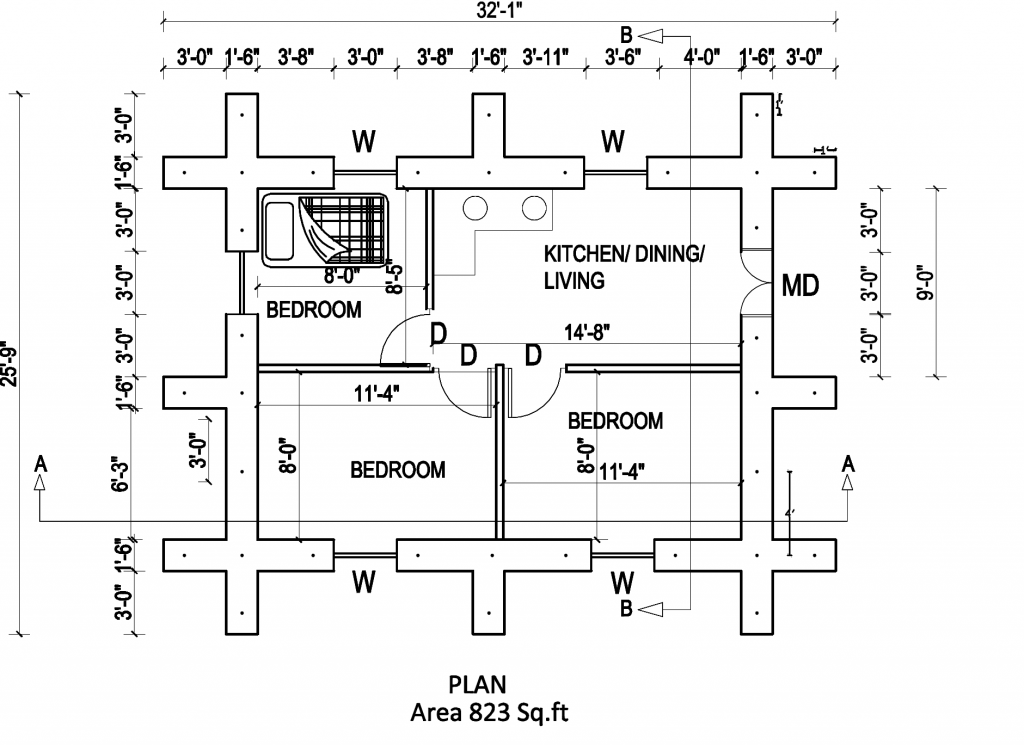
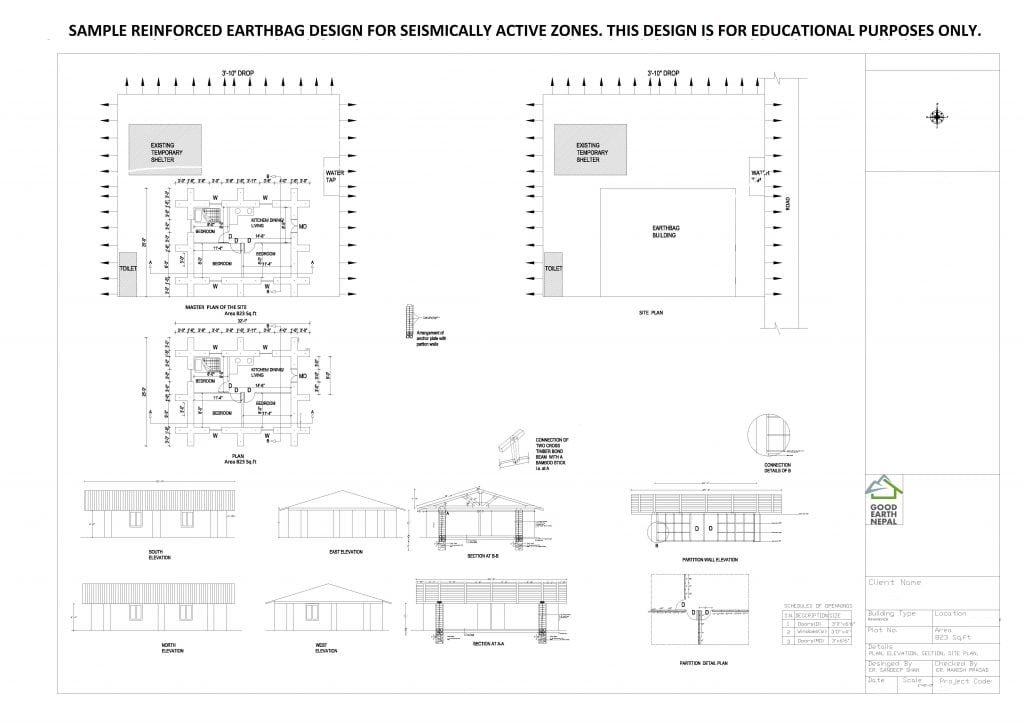
Sample Earthbag House Design
This artchitectural drawing shows an example of an earthbag house floor plan.
References
Vadgama, N., & Heath, A. (2010). A Material and Structural Analysis of Earthbag Housing. University of Bath, Somerset, United Kingdom, Department of Architecture and Civil Engineering.
Croft, C., & Heath, A. (2011). Structural Resistance of Earthbag Housing Subjected to Horizontal Loading. University of Bath, Somerset, United Kingdom, Department of Architecture and Civil Engineering.
Kaki, H., & Kiffmeyer, D. (2004). Earthbag Building: The Tools, Tricks and Techniques (1st Edition). British Columbia, Canada: New Society Publishers.
Stouter, P. (2015, May). Earthbag Options for Nepal: Draft Guidelines for Reinforcement. Retrieved September 15, 2015, from http://buildsimple.org/resource-lists.php
Geiger, O. (2015, September). Earthbag Building Guide (Abridged and Adapted for Builders) – Special Edition by Osho Tapoban Publications.
Geiger, O. (2013). Natural Building Blog – Earthbag Building & Other Natural Building Methods. Retrieved August 1, 2015, from http://www.naturalbuildingblog.com/
Good Earth Nepal (2015). Retrieved January 10, 2016, from: http://www.goodearthnepal.org/
Hart, K. & Geiger O. (n.d.). EarthbagBuilding.com: Sharing information and promoting Earthbag building. Retrieved January 10, 2016, from: http://www.earthbagbuilding.com/
Geiger, O., Hart, K. & Stouter, P. (n.d.). EarthbagStructures.com: Earthbag Solutions for Disaster-Prone Regions. Retrieved January 10, 2016, from:http://earthbagstructures.com/
Bidoun (2004). Bidoun. Retrieved January 10, 2016, from: http://bidoun.org/
Wikipedia (2016). Rubble Trench Foundation. Retrieved March 12, 2016, from:
https://en.wikipedia.org/wiki/Rubble_trench_foundation
Irene Turner (2016). IT Sonoma Style. Retrieved March 20, 2016, from: http://irene-turner.com/
