November 20, 2015

How to build a solar-powered USB charger for phones and other small devices

Part Two in a two-part series. Part One: How to build a solar-powered electronic circuit.

Last year, our team at Mbadika was working on an idea to help aspiring young innovators and entrepreneurs learn the basics of product design and development. Based on our experience, hands-on learning of hardware and electronics were the lessons that stuck with us. We’ve spent the past year developing a DIY (do-it-yourself) kit for youth to gain hands-on experience with electronics and hardware.

Our inaugural DIY kit is a Solar USB Charger to introduce youth to electronics prototyping and solar technology.

Solar USB charger

Kids in a Mbadika Workshop assemble their Solar USB Charger.

We’ve spent the past few months testing our Solar USB Chargers with youth in South Africa, which is how we met EduGreen and started our partnership. After receiving amazing feedback from our workshop participants, we’ve decided to further develop our Solar USB Charger kit in order to launch in South Africa later this year.

The following is a step by step guide to building the Solar USB Charger we debuted at Maker Faire Africa 2014 in Johannesburg.

Materials

  • 0.5 Watt Solar Panel
  • Mini Breadboard
  • DC to DC Booster Circuit: 0.9V to 5V Circuit
  • Mini Slide Switch SPDT
  • 2xAA Battery Holder
  • 2xAA Rechargeable Batteries
  • N914 Diode
  • (6) Jumper Wires (Recommended Length: 125mm)
  • (2) 3mm LEDs
  • Optional: Solid Core Wire
Solar USB charger

This is the layout of Mbadika Solar USB Charger components.

Hint: Components with an asterisk (*) should be prepared for use with a breadboard by soldering solid core wire leads to the positive (anode) and negative (cathode) leads of the electronic component. Our Solar USB Charger kits include electronic components with jumper wires soldered and hot glued instead of a typical solid core wire.

WE DO NOT RECOMMEND using jumper wires, despite being great to use with breadboards, because if the soldering iron touched the plastic component of the jumper wire, it can release toxic fumes.

Give your Solar Panel a Test Run

We will be using a LED in order to test our Solar Panel.

A basic LED has two leads, a positive (anode) and negative (cathode) lead. In order to identify the positive and negative leads of a LED, one lead is shorter than the other. The longer lead is the positive (anode) lead and the shorter lead is the negative (cathode) lead.

Solar USB charger

Illustration 1. Breadboard layout for testing Solar Panel.

Place the breadboard in the landscape orientation, as shown in Illustration 1.

If your Solar Panel does not already have exposed solid core wire ends, attach solid core wires to the positive and negative leads of the solar panel via soldering in order to insert the Solar Panel into the breadboard electronic circuit.

For the purpose of our kits, we use Solar Panels with a wire connection component. The wire connection component allows the user to extend the positive and negative leads of the Solar Panel via the insertion of jumper wires in the corresponding holes.

Place your Solar Panel and LED leads in the holes of the breadboard, as shown in Illustration 2. If your LED lights up, your Solar Panel is functioning.

Step 1: The DC to DC USB Booster Circuit

The DC to DC USB Booster Circuit will allow for you to charge your USB powered device through increasing the DC Voltage from 2.4V to 5V, which is ideal for charging small electronic devices such as basic smartphones, mobile players, and feature phones.

Note: One AA battery is 1.2V. Since our circuit uses two AA batteries, our circuit voltage is 2.4V.

Solar USB charger

Illustration 2

Place your DC to DC USB Booster Circuit leads in the holes of the breadboard as shown in Illustration 2.


Solar USB charger

Breadboard layout with USB DC to DC Booster Circuit.

As shown in the photo, your breadboard layout should be fairly simple.

Hint: When inserting electronic components in a breadboard, it is ideal to place the leads of your electronic components in the same row. Placing your electronic components in the same row allows for easy trouble-shooting in the future.

Hint: If you are comfortable you can arrange your electronic component in whichever column or row. However, the electronic component leads illustrated in a particular column in the following illustrations must be in THE SAME COLUMN and on the SAME SIDE (below or above the hollowed middle section) of the breadboard for the electronic circuit to function.

USB charger

Mini Slide Switch setup with soldered jumper wires and hot glue.

Step 2: The Switch

The Mini Slide Switch is an electronic component that will allow for you to control when your Solar USB Charger device is on or off.

This step can be a bit tricky in terms of identifying the middle pin and the end pin. As the photo shows, the middle pin is the middle component of the mini slide switch while the end pin is either the left or right pin.

USB charger

Illustration 3

Once you have your Mini Slide Switch pin and leads selected and prepared, place your Mini Slide Switch in the breadboard as shown in Illustration 3.


Breadboard

Breadboard layout with Mini Slide Switch.

At this stage, your breadboard should look like the one in this photo.

Step 3: The Battery Holder

The Battery Holder will be the private storage facility for the power accumulated from the Solar Panel as well as a backup power source when your Solar Panel cannot charge your USB powered device directly.

USB charger

Illustration 4. Breadboard layout for 2xAA Battery Holder.

Place your Battery Holder as shown in Illustration 4.
USB-12

Now your breadboard should start to look like this.

Step 4: The N914 Diode

The N914 Diode is a signal diode is an electronic component that prevents current in your Solar USB Charger circuit to travel in the reverse direction or in essence un-charge your electronic device.The N914 Diode is recognizable because it has a red central body with a thin black line on one end.

USB charger

Illustration 5

Place the N914 Diode in your breadboard as shown in Illustration 5.


USB charger

Illustration 6. Breadboard layout with N914 Diode.

Ensure the Negative Pin (the end of the electronic component with a thin black line) of the N914 Diode is in the same column as the positive lead of the Battery Holder and DC to DC USB Booster Circuit, as shown.

Now, you are ready for the final step in your Solar USB Charger build.
USB-14

Step 5: The Solar Panel

Place your Solar Panel in your breadboard as shown in Illustration 6.

USB charger

Illustration 7

DOUBLE CHECK YOUR CIRCUIT.

Make sure your circuit matches the breadboard circuit diagram in Illustration 7 and looks similar to the one pictured here.

DOUBLE CHECK YOUR CIRCUIT ONE LAST TIME.

USB-16

Step 6: Test Driving your Solar USB Charger

Place your AA Rechargeable Batteries in your Battery Holder.

WARNING: If your circuit begins to smoke or the plastic components in the circuit start to melt, IMMEDIATELY remove all of the components from the breadboard as quickly as possible and if possible remove the rechargeable batteries from the battery holder.

Now…slide your Mini Slide Switch…the red LED on your DC to DC USB Booster Circuit will turn on and…Voila!

You are ready to plug in your USB cable and charge your small electronic device.

Solar charger

Our first Solar USB Charger prototype comes to life.

Note: The Solar USB Charger will not power Apple devices, smartphones with large lithium ion batteries, or tablets.


USB charger

Mbadika Solar USB Charger for Mobile Devices Acrylic and Plywood versions.

Further Steps

You can build an enclosure for your Solar USB Charger like these that we make.

For our Solar USB Charger Kits for youth, we use a laser cutter on MIT campus in order to cut LEGO inspired enclosures from plywood and acrylic. If you have access to a laser cutter, you can find tons of open-source laser cutting files (typically Adobe Illustrator or Corel Draw files) to download and use to create fun enclosures for your Solar USB Charger. However, we are aware the majority of the planet does not have access to such facilities and there are other solutions to showcase your new solar build.

Our favorites are made from small plastic storage containers or Altoids tins. A fellow MIT alum, Ladyada of Adafruit Industries developed a Altoids Tin enclosed USB Charger Kit called the MintyBoost that has become a huge hit in the maker community. If your solar panel is small enough, you can have the solar panel be attached on the outside of the Altoids Tin for charging and stored in the tin when not in use.

Given the solar enclosure will be exposed to large amounts of sunlight, we would not suggest using cardboard or a paper-based product as your solar enclosure.

Soldering

As our Solar USB Charger kit is focused on introducing youth to electronic prototyping via a breadboard, we try to minimize soldering as much as possible.

If you would like to create a more permanent Solar USB Charger through soldering your components, Joshua Zimmerman has an excellent Instructables on a soldered version of the Solar USB Charger we’ve illustrated above.

Are you shopping for components to make your very own? Here are some places to buy materials:

  • Brown Dog Gadgets
  • SparkFun Electronics

If you need a little more help to get started, check out the Solar USB Kit 1.0 by BrownDog Gadgets.

More resources


Comments from the Community

8 Comments

  1. Edward Melhem says:

    how quick will this charge? cheers xx

  2. james says:

    i was just gonna cut a usb phone charger and the find a way to plug it directly in this will work great

  3. Joe says:

    Is there a way to make this work with smartphones and such. My battery states that power source is unstable.

  4. ERIC MOLEFE says:

    SO THIS CHARGER CHARGE UP TO HOW MUCH WATTS

  5. antonetta.kowalewski says:

    You can find best solutions on http://www.avasva.com website.

  6. bohlale machinini says:

    Hi my name is Bohlale Machinini and I am 12 years old, for a science project I will testing whether a solar powered power bank would be useful in a persons everyday life. I would like to ask you if I could get one of your solar powered power bank kits to perform this experiment. please do get back to me with an answer as soon as you can on this email, bohlale.machinini@gmail.com.

    Kind Regards
    Bohlale Machinini

  7. Zaidatul Akmal bt Mohammad Khairuddin says:

    Can i have the complete circuit diagram?

  8. uche gift says:

    this is a very nice writeup but i will be more greatful if this is written to me in a theorithical format. i want to use it as a seminer topic here in my school and i will give you feedback on those who are intrested on the practical. thank you.
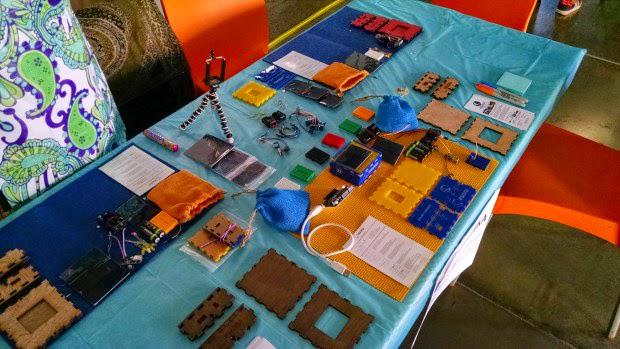
Leave a Reply

Join a global community of changemakers.

Become A Member